
Are you Windows 11 and the Wi-Fi option mysteriously disappeared? Do not panic ! This problem, while frustrating, is often easy to fix. In this article, we will explore it in detail different possible causes and will provide step-by-step solutions accompanied by clear and simplified explanations to help you find your Wi-Fi connection in the blink of an eye.
1. Run the Windows troubleshooter
Start by launching Windows 11’s built-in troubleshooters. They can often detect and fix Wi-Fi connection problems automatically.
1.1 Troubleshooting Internet Connection Problems
- Click onTo get started>Settings>Network and internet>État.
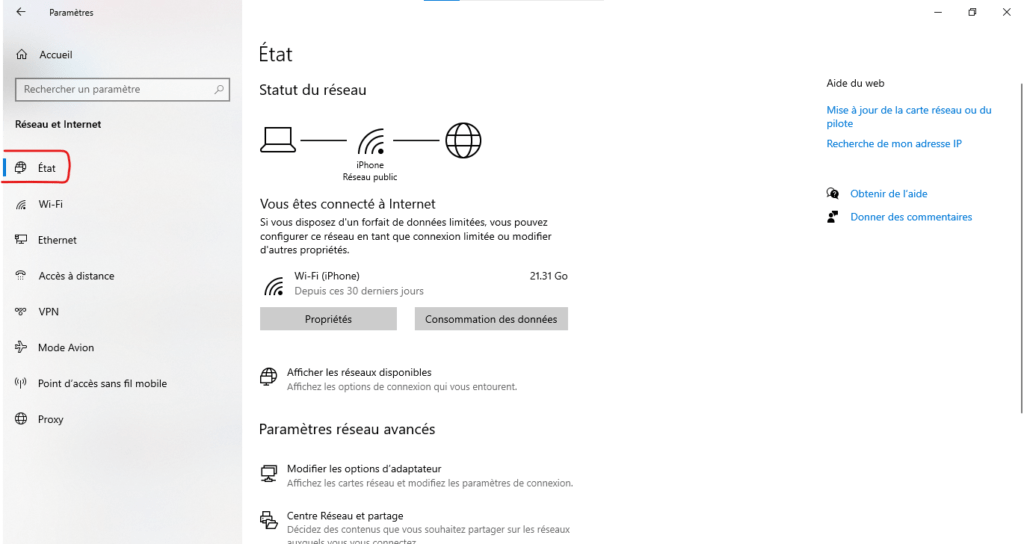
- SousChange your network settingschooseTroubleshooting.
- Run the troubleshooterInternet connection.
1.2 Network adapter troubleshooting
If the problem persists, run the Network Adapter Troubleshooter:
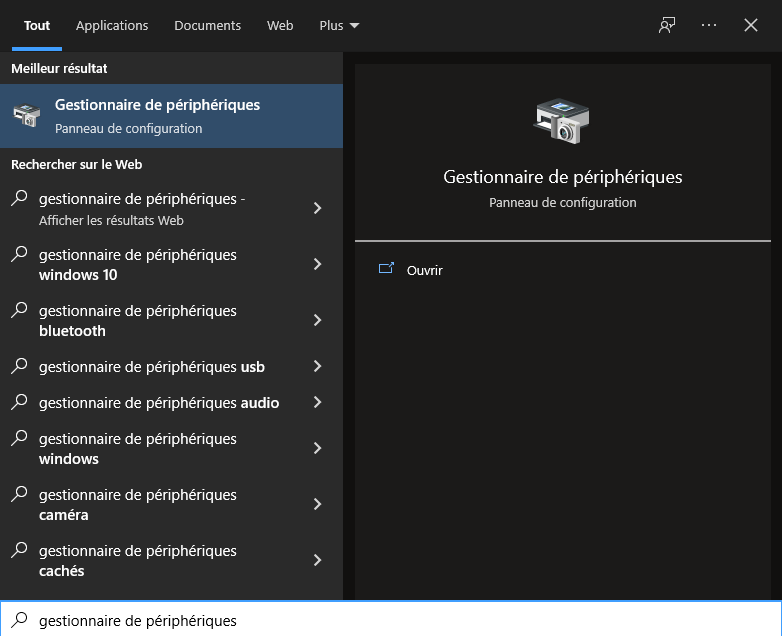
- Open itdevice administrator(right click on Start).
- They expandNetwork adapters.
- Right click on your network adapter and selectI am solving problems.
2. Enable the Wi-Fi adapter in the network connections
Your Wi-Fi adapter may simply be disabled. Let’s check its status:
- Click the iconNetworkon the system disk.
- If Wi-Fi is off, click the buttonWi-Fipour l’activer.
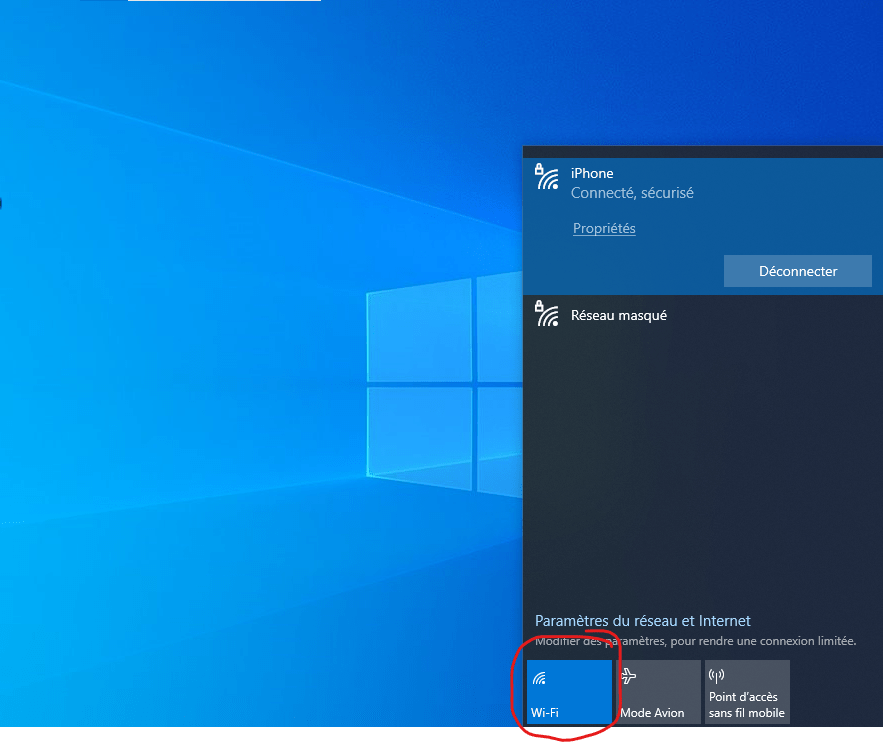
If the Wi-Fi option is missing, follow these steps:
- OpenSettings>Network and internet>Wi-Fi.
- Select Activez l’Show available networks.
- If your Wi-Fi network is visible, select it and clickI’m connecting.
3. Update your network card drivers
Outdated drivers can cause connectivity issues. Make sure your network card drivers are up to date:
3.1 Automatic driver update
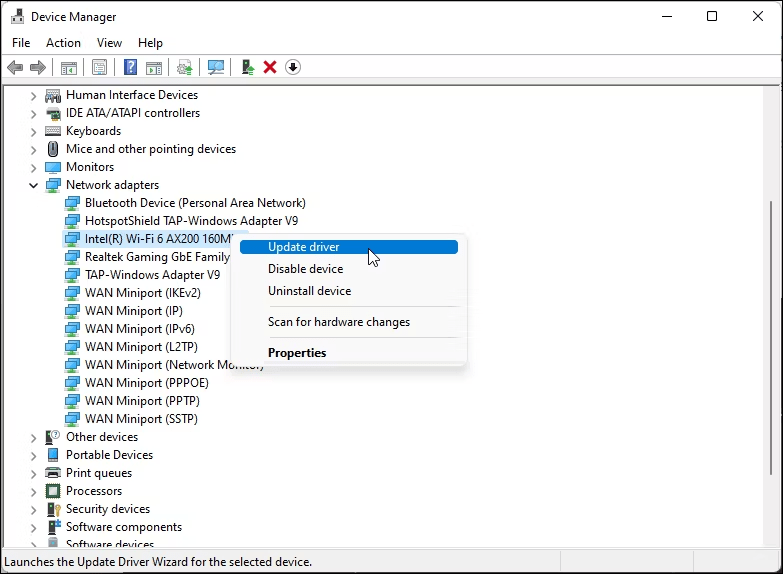
- Open itdevice administrator.
- They expandNetwork adapters.
- Right click on your network adapter and selectUpdate driver.
- ChooseAutomatically check for updated drivers.
3.2 Manually updating drivers
If the automatic update fails, you can download and install the latest driver from your network card manufacturer’s website.
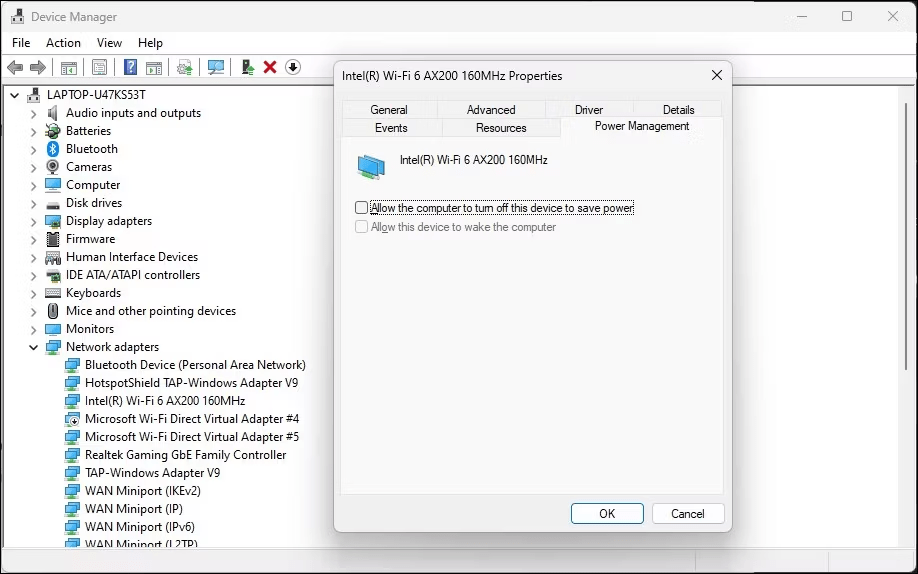
4. Configure the power management settings of the network adapter
Windows may sometimes disable the Wi-Fi adapter to save power. Change these settings:
- Open itdevice administrator.
- They expandNetwork adapters.
- Right click on your network adapter and selectProperties.
- Dans l’ongletPower managementuncheck the boxAllow the computer to turn off this device to save power.
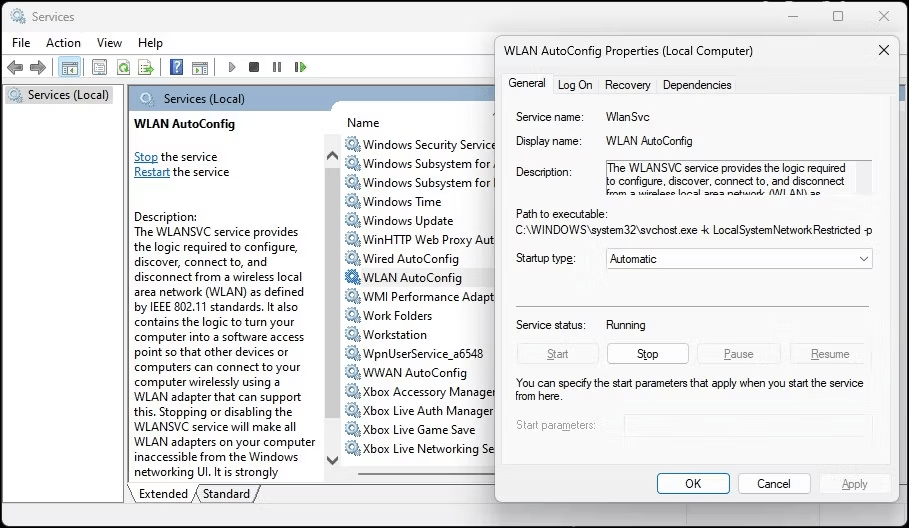
5. Enable the WLAN auto-configuration service
This service is vital for managing Wi-Fi connections. Make sure it’s enabled:
- Press itWindows + Rto open the windowImplementation.
- Tapezservices.mscand pressEntrance.
- Search for the serviceAutomatic WLAN configuration.
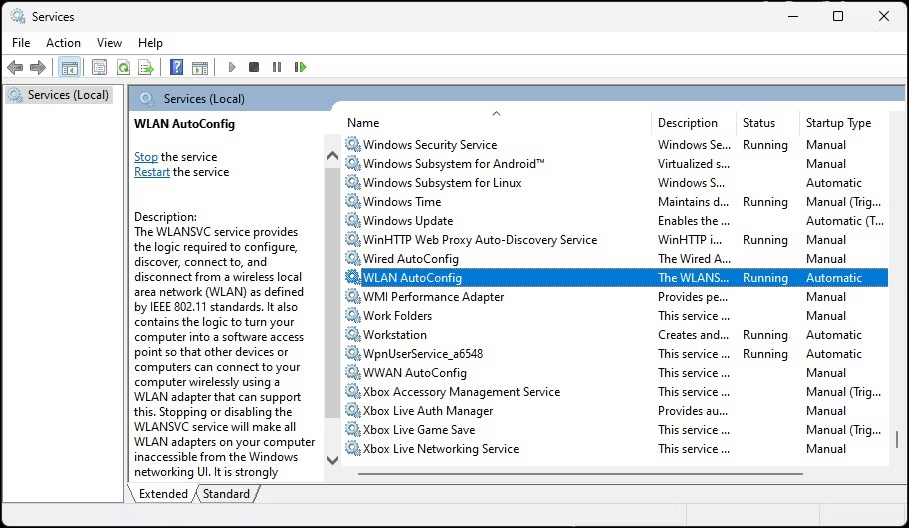
- Double click on the service and make sure thatStartup typeIt has been setAutomatic.
- Click onTo get startedif the service is interrupted.
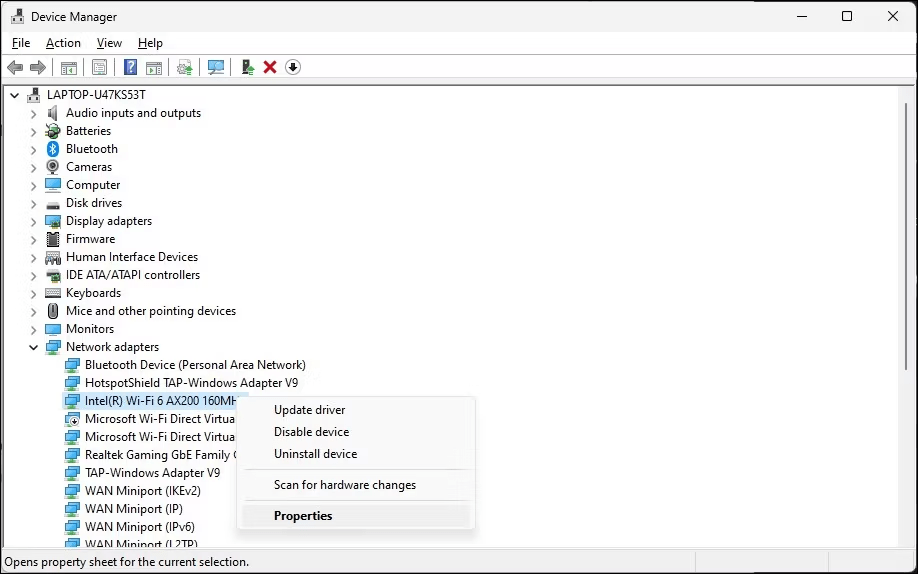
6. Reinstall the Wi-Fi device driver
Reinstalling the driver may resolve corruption issues:
- Open itdevice administrator.
- They expandNetwork adapters.
- Right click on your network adapter and selectUninstall device.
- Restart your computer.
- Windows will automatically reinstall the driver on restart.
7. Reset the network device and network stack
7.1 Network device reset
Step 1: Open command prompt with administrator rights
- Right click on the buttonTo get startedand selectCommand Prompt (Admin).
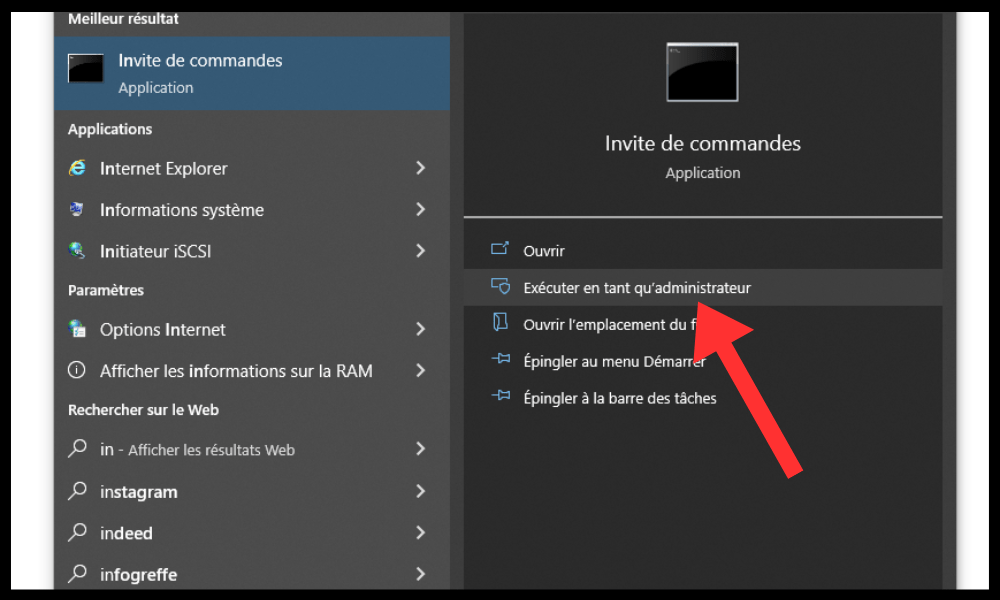
- If a User Account Control pop-up appears, click itOuito allow elevated command line execution.
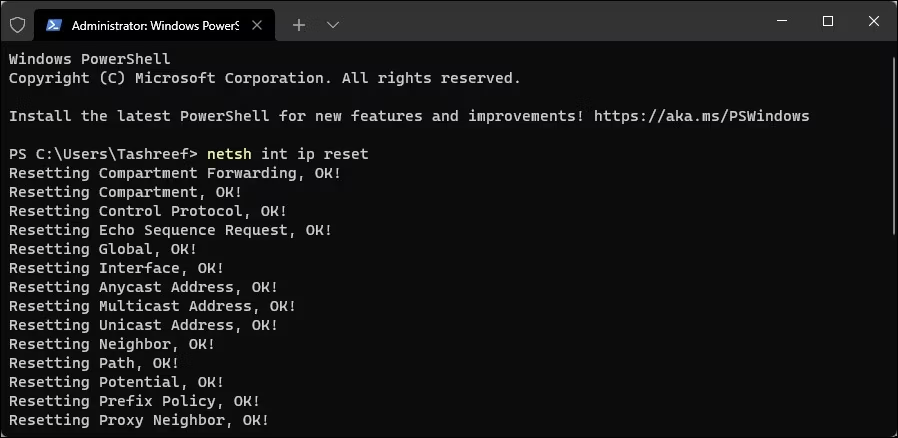
Step 2: Run the restore command
- At the command line, type the following command:
netsh int ip reset c:\resetlog.txt
Explanation of the command:
netsh: Windows Network Configuration Toolint: Network interfaceip: Internet Protocolreset: Resets the network settingsc:\resetlog.txt: Saves a log of the restore to a fileresetlog.txton drive C:\
Step 3: Restart the computer
Restart your computer for the changes to take effect.
7.2 Restore the network stack
- At the command line, type the following commands one by one, pressingEntranceafter each:
netsh winsock reset
netsh int ip reset all
ipconfig /release
ipconfig /renew
ipconfig /flushdns
- Restart your computer.
8. Advanced Solutions (If the previous solutions don’t work)
If none of the solutions above resolve the issue, more advanced solutions may be needed:
8.1 Check for hardware interference
Remove any USB or Bluetooth devices that may interfere with the Wi-Fi signal.
8.2 Editing the Windows Registry (Warning: Proceed with Caution)
 Warning: Editing the Windows registry can cause system problems. Only instructions provided by reliable and technical sources should be followed. It is strongly recommended that you create a system restore point before making these changes.
8.3 Resetting Windows 11 (as a last resort)
If all other solutions fail, you can consider resetting Windows 11 to its default settings. Remember to backup your important data before performing the reset.
conclusion
By following these steps, you will be able to resolve the issue of no Wi-Fi option in Windows 11. If you are still facing difficulties, please do not hesitate to consult Microsoft technical support or your card manufacturer’s network for further assistance.